Home
>
Airgun Rendezvous Main Forum
>
Topic
Re: Complete Workbench Drawers Project - Pics
|
Complete Workbench Drawers Project - Pics December 19, 2012 05:14AM |
|
Admin Registered: 15 years ago Posts: 14,038 |

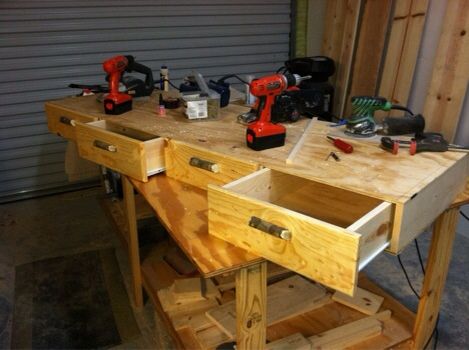
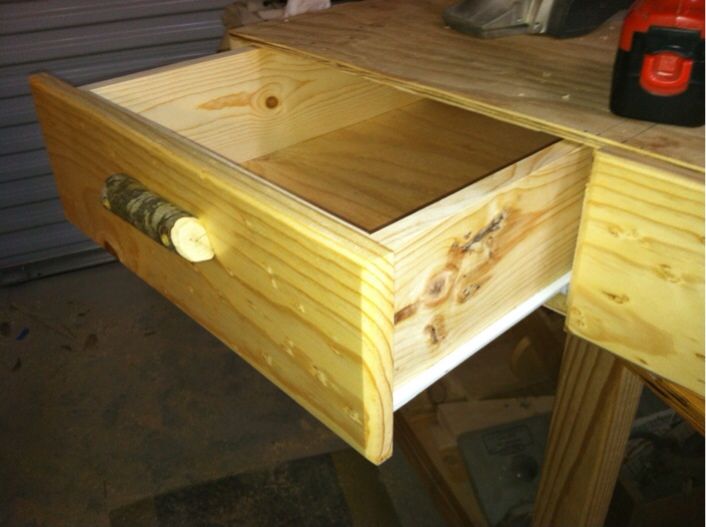
These are simply built, but glued together well, and should give good service. I haven't had a lot of good drawer space before, so I'm pleased with this.

I tried to do a lousy job but the wood is pretty and the whole thing turned out great! Haha. I'm in trouble with Kelly, 'cause she wants them in the house. Hehe.


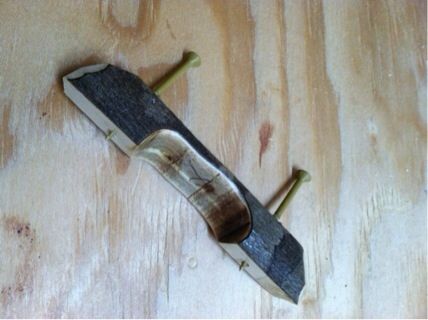
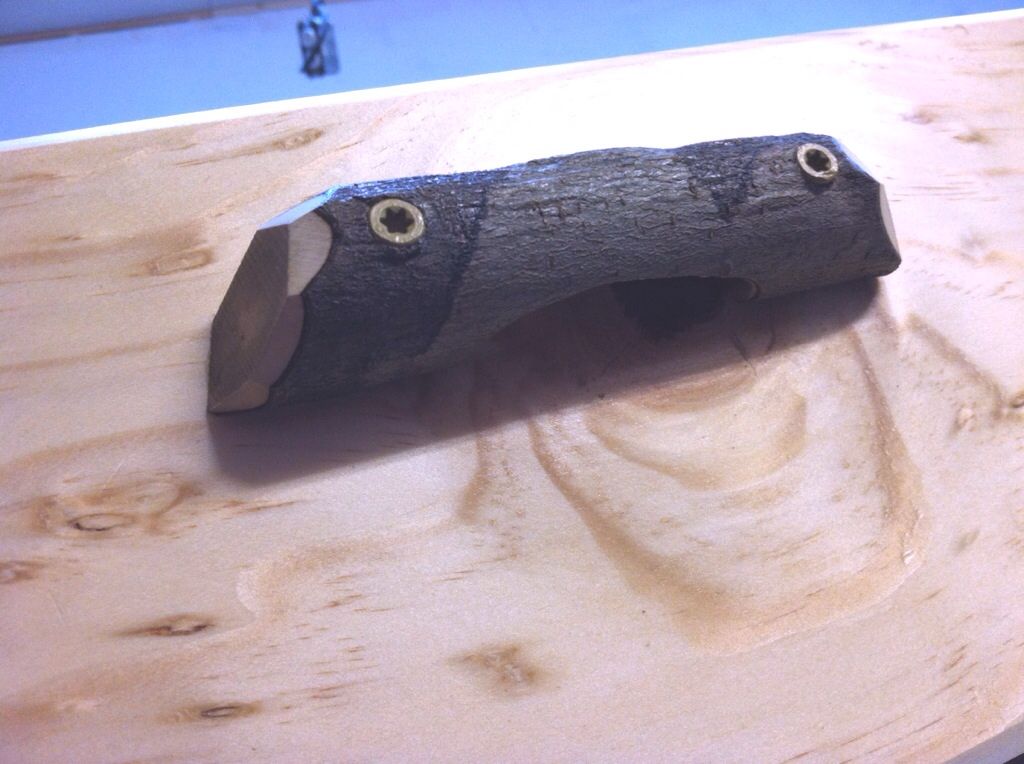
I band sawed some drawer pulls from Yupon Holly. Kicked the flats over off Axis from the cut out about 30 degrees so it presents a nice finger tip recess pull.

The pine was a 1 by 8 from Lowes which showed a neat spalted bird's eye pattern. I used one board for the full length of all four drawers. Attached it with pulls. Marked the joints. Then took it off and cut the four drawer faces apart. Makes the grain follow thru. All simple things that just make the unit so much more pleasing to use. Most of the time a design with character doesn't take much longer then a butt ugly design.
 .
.
Don't give me grief for finishing the drawer fronts. That's a brush on lacquer sanding sealer. Dries very fast. Will keep the wood from warping as it's brushed both sides. And it will keep the drawer fronts from becoming filthy and staining. (It was Kelly's idea - blame her ... hahah .... and then they all look pretty and I'm busted. hahaha.
Now this unit goes up in the studio shop under the workbench top.
Thanks for reading. Oh, I also cut half of that second shooting lane.
Gary
Edited 1 time(s). Last edit at 12/19/2012 05:23AM by barnespneumatic.
|
Re: Complete Workbench Drawers Project - Pics December 19, 2012 05:23PM |
Admin Registered: 15 years ago Posts: 1,489 |
Gary,
Interesting tips that someone who doesn't have cabinetry experience may not think of, e.g., using the sam piece of wood for all the drawer faces. As far as sealing them, smart IMO. We knew that was Kelly.
I was curious about leaving the work bench by the roll-up door. I'll assume you use that entrance as a nice large main shop entrance?
Lon
Interesting tips that someone who doesn't have cabinetry experience may not think of, e.g., using the sam piece of wood for all the drawer faces. As far as sealing them, smart IMO. We knew that was Kelly.

I was curious about leaving the work bench by the roll-up door. I'll assume you use that entrance as a nice large main shop entrance?
Lon
|
Re: Complete Workbench Drawers Project - Pics December 20, 2012 03:21AM |
|
Admin Registered: 15 years ago Posts: 14,038 |
Hi Lon,
There ya go - more tips then you can file away from reading here.
Regarding the bench and the door saga. Gee - I do forget that there are STILL people out there WITHOUT a tractor and bucket lift WITH pallet fork attachments. hahahahah.. That bench can go anywhere I want it in a few minutes. Outside is one quick option if needed.
  However; it WILL have roller wheels on it to shuttle back and forth over a couple of times it's length if needed.
Hey Lon - I went to load some pics last evening ... And ... computer tells me my hard drive is full! Evidently I have about 120 Gigs of pictures on this unit. That's what you call a "well documented career". hahah. I have half a Terabyte external ...... in Maryland ... yes. So - guess it's Thumb Drive City for now.
Merry Christmas Lon.
Gary
There ya go - more tips then you can file away from reading here.

Regarding the bench and the door saga. Gee - I do forget that there are STILL people out there WITHOUT a tractor and bucket lift WITH pallet fork attachments.
 hahahahah.. That bench can go anywhere I want it in a few minutes. Outside is one quick option if needed.
  However; it WILL have roller wheels on it to shuttle back and forth over a couple of times it's length if needed.
Hey Lon - I went to load some pics last evening ... And ... computer tells me my hard drive is full! Evidently I have about 120 Gigs of pictures on this unit. That's what you call a "well documented career". hahah. I have half a Terabyte external ...... in Maryland ... yes. So - guess it's Thumb Drive City for now.
Merry Christmas Lon.

Gary
|
Re: Complete Workbench Drawers Project - Pics December 20, 2012 05:16AM |
|
Admin Registered: 15 years ago Posts: 14,038 |
|
Re: Complete Workbench Drawers Project - Pics December 19, 2012 09:34PM |
Registered: 15 years ago Posts: 2,524 |
|
Re: Complete Workbench Drawers Project - Pics December 20, 2012 05:13AM |
|
Admin Registered: 15 years ago Posts: 14,038 |
Hi Sean,
Yeah - they are nice. Of course - they couple them WITH:
1). Self drilling feature. Works pretty well in framing materials. I's still predrill good stuff.
2). Exterior coatings. Those are real good. Of course - if you slip the star drive or chip the coating (which IS tough) they you get some rust there. The screws are very rust resistent though.
Star Drive with self drilling and coatings ...means they are expensive. Phillips in black or the dichromatic dip are dirt cheap.
And - of course - you have to have a bucket full of T-20 and T-25 star drive bits cause they are seldom anywhere near the screws or the drill. hahaha.
Gary
|
Re: Complete Workbench Drawers Project - Pics December 20, 2012 05:24AM |
Registered: 15 years ago Posts: 966 |
|
Re: Complete Workbench Drawers Project - Pics December 20, 2012 09:13AM |
Registered: 14 years ago Posts: 73 |
Hi Garry, I noticed you have the growth rings on the drawer fronts concave out. I ask this because this is how I alway's present the grain with drawers, on table tops and such I present the growth rings concave up. As timber dry's out(even timber that we think is dry will move a little once cut/opened up) the growth rings want to streighten out, however the upper face of a top or outward facing surface want's to dry quicker causing the opposite effect. Presenting the growth rings in this way helps to compensate for the growth rings desire to streighten out.
Nice job, Danny.
Nice job, Danny.
|
Re: Complete Workbench Drawers Project - Pics December 20, 2012 06:55PM |
Registered: 15 years ago Posts: 2,524 |
|
Re: Complete Workbench Drawers Project - Pics December 22, 2012 12:29AM |
Registered: 15 years ago Posts: 68 |
I was burning through # 2 phillips + bits on my deck and a contractor told me to try impact tips.
Only went through one more bit on the rest of the deck for the little extra money the're sure worth it.
Also tried those Pro Grabit screw extractors and they really made it easy to back out the screws that I stripped the heads on.
Joe
Only went through one more bit on the rest of the deck for the little extra money the're sure worth it.
Also tried those Pro Grabit screw extractors and they really made it easy to back out the screws that I stripped the heads on.
Joe
|
Re: Complete Workbench Drawers Project - Pics December 22, 2012 04:49AM |
|
Admin Registered: 15 years ago Posts: 14,038 |
Sorry, only registered users may post in this forum.
Online Users
Guests:
20
Record Number of Users:
4
on March 10, 2022
Record Number of Guests:
234
on February 21, 2021

